


")


")


Turn Your Raspberry Pi Into An Always On Torrent Downloading Beast
Most of us keep our power-hungry laptop or desktop on burning days and night because we are in the middle of some downloads or we are uploading something (due to very low download/upload ratio). In the age of IoT smart guys seek smart solutions. Here is a very elegant approach to the same. Here we will learn about Raspberry Pi Torrent Downloader Box.
Before we start you must have a Raspberry Pi unit with Raspbian installed, you can access the device either directly via an attached monitor and keyboard or remotely via SSH and VNC. Now you are ready to turn your Pi Into an Always On Raspberry Pi torrent downloader box.
Installing Deluge on Raspbian
We have lots of option to choose torrent client on Linux based Raspbian, but for our purposes we selected Deluge.
Deluge is a full-featured BitTorrent client for Linux, OS X, Unix and Windows. It uses libtorrent in its backend and features multiple user-interfaces including GTK+, web and console. It has been designed using the client-server model with a daemon process that handles all the BitTorrent activity. The Deluge daemon can run on headless machines with the user-interfaces being able to connect remotely from any platform.
Deluge features a rich plugin collection; in fact, most of Deluge’s functionality is available in the form of plugins.
READ MORE: Fedora Linux Distro Available For Raspberry Pi – Here’s How To Install It
Choosing Your Perfect Deluge Client:
We can choose the following options
- Installing torrent client directly on Raspberry pi as a desktop client
- Access the Deluge client via Deluge WebUI on the same network
- Running the Deluge core on the remote machine and accepting thin client connections either via Deluge Desktop client or Deluge WebUI
In 3rd option, we can use the actual Deluge desktop client on our desktop machine and connect it into the remote Raspberry Pi Deluge installation. Here we get all the benefits of the desktop client on your actual desktop while the actual downloading happens on the remote box. So lets start with 3rd and best choice.
Before we do anything, however, let’s take a moment to update and upgrade our repositories:
sudo apt-get update
sudo apt-get upgrade
Setting up Deluge to be accessed remotely
Enter the following commands in the terminal:
sudo apt-get install deluged
sudo apt-get install deluge-console
This will download the Deluge daemon and console installation packages and run them. After Deluge has finished installing, Run the Deluge daemon. Enter the following commands in the terminal:
deluged
sudo pkill deluged
Via this command, we have started the deluge daemon. Since this was the first time we have started the daemon so that deluge will generate the configuration file in which we are interested. After generating the file we stopped the daemon.
Lets edit the config file don’t forget to take the backup.
cp ~/.config/deluge/auth ~/.config/deluge/auth.old
vim ~/.config/deluge/auth
You can use any other editor for editing purpose.
Add a line to the bottom of the configuration file with the following convention:
user:password:level
Where in user is the username you want for Deluge, the password is the password you want, and the level is 10 (the full-access/administrative level for the daemon). For our purposes, we used pi:myberry:10. When you’re done editing, hit:wq and save your changes. Once you’ve saved them, start up the daemon again and then the console:
deluged
deluge-console
If starting the console gives you an error code instead of nice cleanly formatted console interface type exit and then make sure you’ve started up the daemon.
Once you’re inside the console, we need to make a quick configuration change. Enter the following:
config -s allow_remote True
config allow_remote
exit
This will basically add an entry in ~/.config/deluge/core.conf file and enables remote connections to your Deluge daemon.
Now it’s time to Close the daemon and restart it one more time so that the config changes take effect:
sudo pkill deluged
deluged
Now, deluge daemon is ready for remote access. We need to install the Deluge desktop client to finish the configuration. Go to the Deluge Downloads page and select the installer for your operating system. We have installed it on Ubuntu. Once you have installed the Deluge desktop client, run it for the first time; we need to make some quick changes.
Once launched, navigate to Edt -> Preferences -> Interface. Within the interface submenu, you’ll see a checkbox for “Classic Mode”. By default, it is checked. Uncheck it.
Hit OK and then restart the Deluge desktop client.
Now you will see the following window. Here you can add your raspberry pi machine with Deluge desktop client.
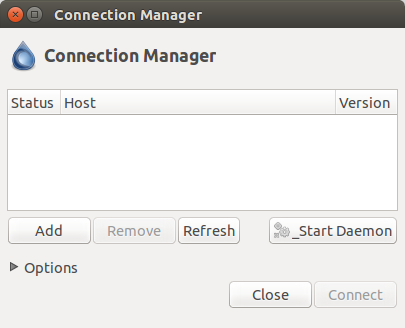
Click on Add button. Next following window will open
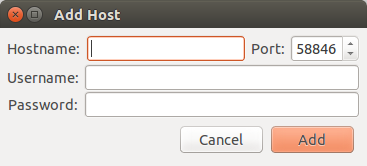
Keep the following things handy for the input which you set earlier –
- The IP address of the Raspberry Pi on your network,
- Username
- Password
Remember: Username and Password are those added to the deluged config auth file.
Leave the port at the default 58846. Click Add. Back in the Connection Manager, you’ll see the entry for the Raspberry Pi; if all goes well, the indicator light will turn green.
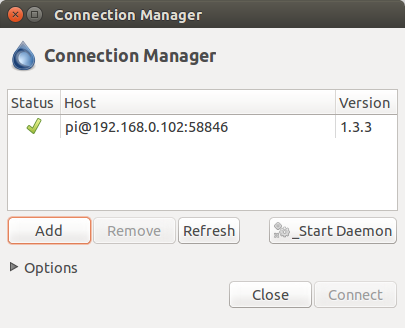
You will see the option to start the remote daemon from connection manager also click on start daemon if not started otherwise left it.
Click Connect and you’ll be kicked into the deluge client-interface, connected to the remote machine.
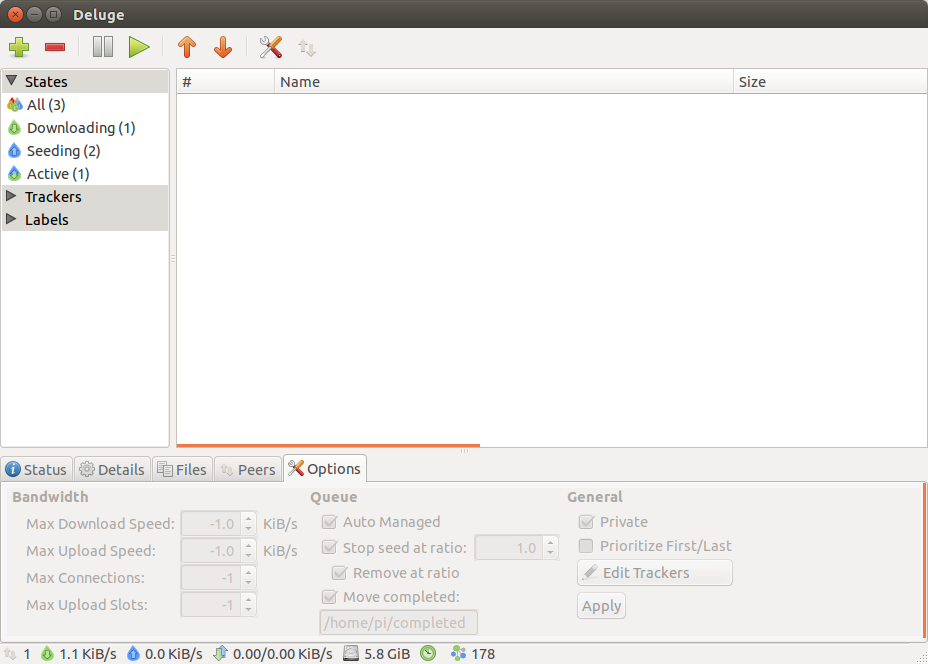
Our connection between the remote machine and the desktop client is a success and we are ready to pile up the download queue!
Setting up Deluge for WebUI Access
To install the WebUI, go to the terminal on your Pi and enter the following commands. You can skip the first command if you already installed deluge daemon.
sudo apt-get install deluged
sudo apt-get install python-mako sudo apt-get install deluge-web deluge-web
This sequence installs the Deluge daemon (if you didn’t already install it in the last section), Mako (Mako is a template library written in Python that the WebUI needs), the WebUI itself, and then starts the WebUI program.
The default port for the WebUI is 8112; if you wish to change it use the following commands:
sudo pkill deluge-web
vim ~/.config/deluge/web.conf
Use vim to edit the line: “port”: 8112, and replace the 8112 with any port number(But make sure that you do not end up using any port being used by other services). Lets set it to 8120.
Once you have the WebUI up and running, it’s time to connect into it using a web browser.
Open up a browser on your regular desktop machine and point it at the IP address of your Pi (e.g. http://192.168.1.102:8120).
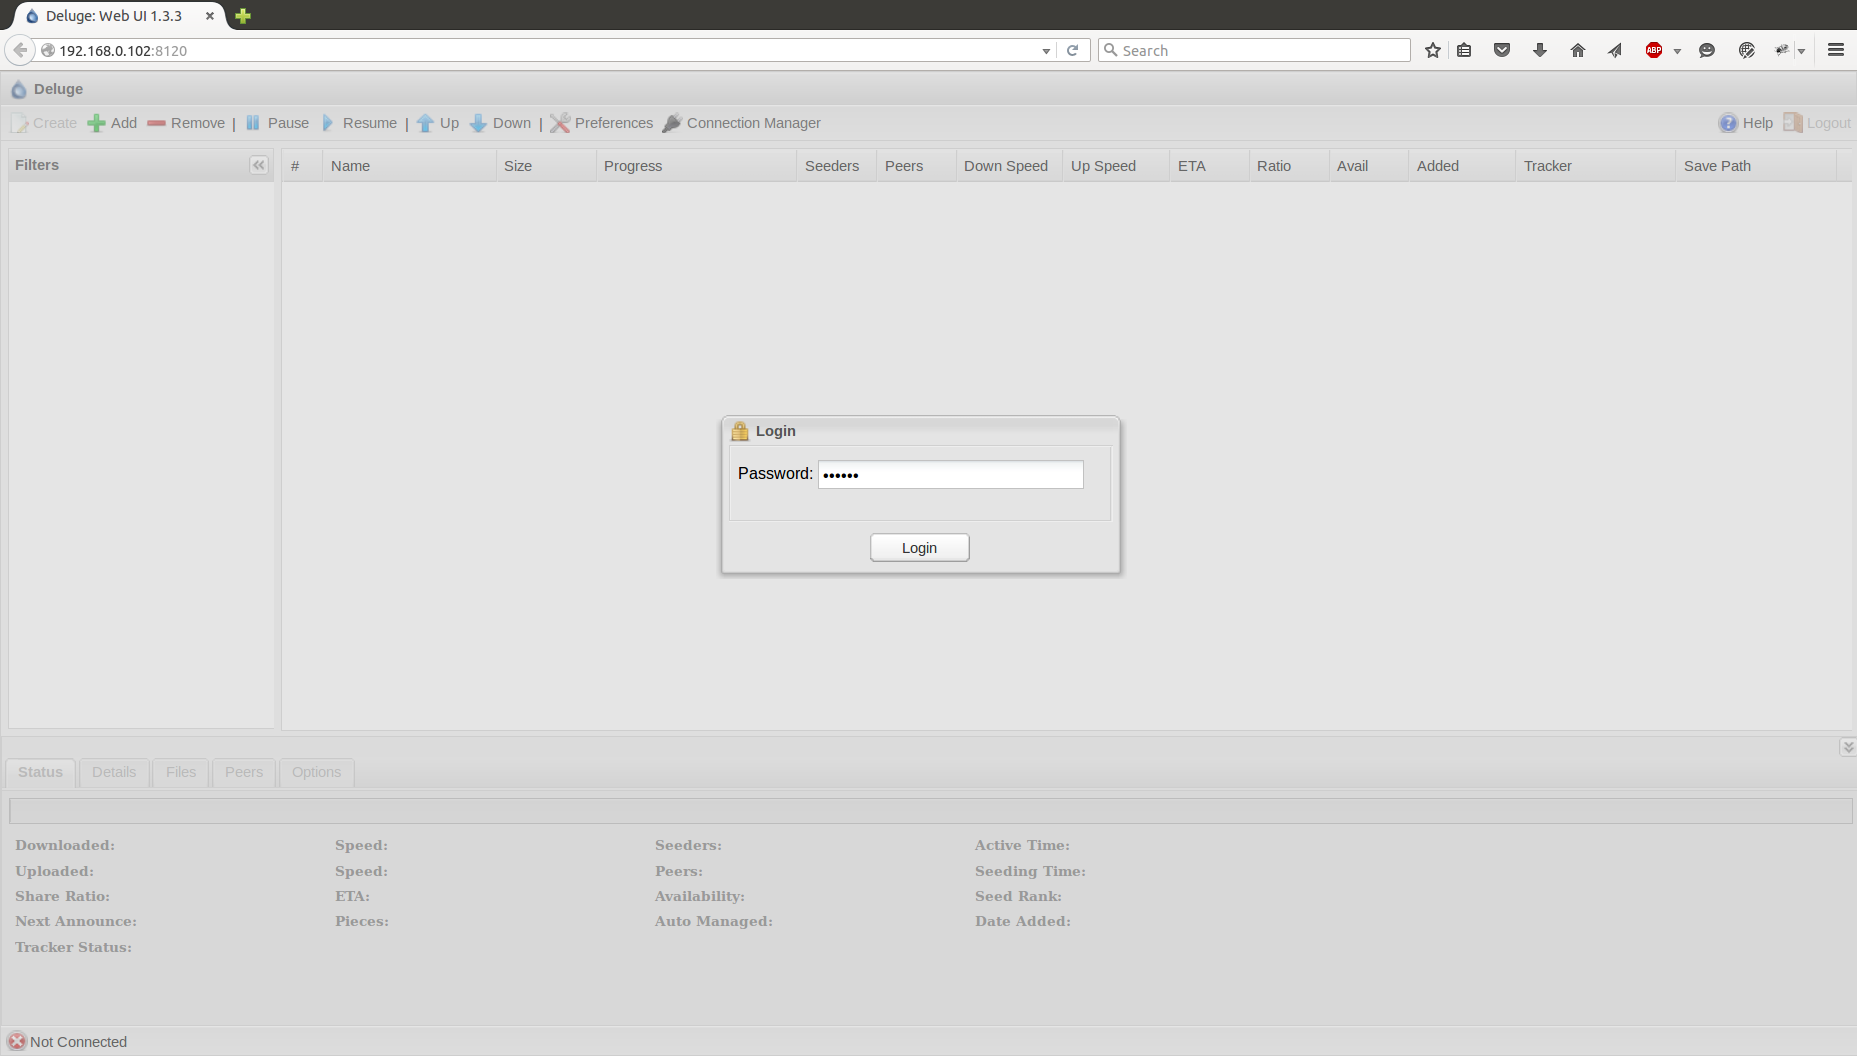
You will see a password prompt (default password is deluge). Enter the default password after that, you’ll be able to interact with Deluge via the lightweight web interface.

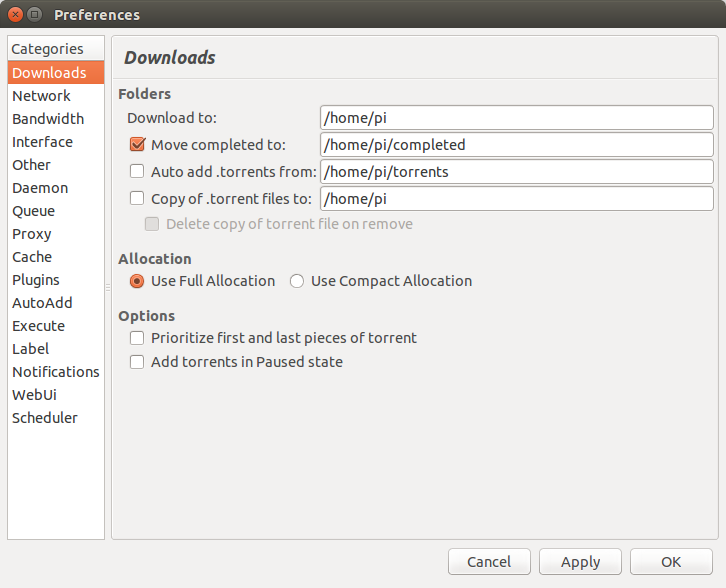
Changing Your Default Download Location
Now, all we need to do is change the default locations in Deluge. Navigate to Preferences -> Downloads. By default, Deluge directs everything to /home/pi.
Create some new folders to your desired location and point them here.
Now we are ready to fill up all the download queue and run it 24×7 as Raspberry Pi Torrent Downloader Box for downloading or uploading purpose.
READ MORE: CSB502SSD Multi-Function Solid State Drive shield for Raspberry Pi 2
Give it a try.  If you liked this article, then please subscribe to our YouTube Channel. You can also search for the latest tech news and follow us on Twitter, Facebook, and LinkedIn.


")


